How to Convert Canva Designs to PSD (In Editable Layers)

This website contains affiliate links. As an Amazon affiliate, I earn from qualifying purchases, our own services and products. This tutorial is an independent guide and is not affiliated with, sponsored, or endorsed by Canva Pty Ltd. All product names, logos, and interface screenshots are used for identification and educational purposes only. Canva is a registered trademark of Canva Pty Ltd. Screenshots are used under fair use for the purpose of commentary and instruction.
Want to convert your beautiful Canva designs into PSD files for Adobe Photoshop? You’re in luck! Today, I’m breaking down a simple, step-by-step guide to help you effortlessly convert Canva designs into editable PSD files.
This quick and easy tutorial is perfect for graphic designers, freelancers, and content creators who want the flexibility to edit their Canva designs in Photoshop. Let’s dive in!
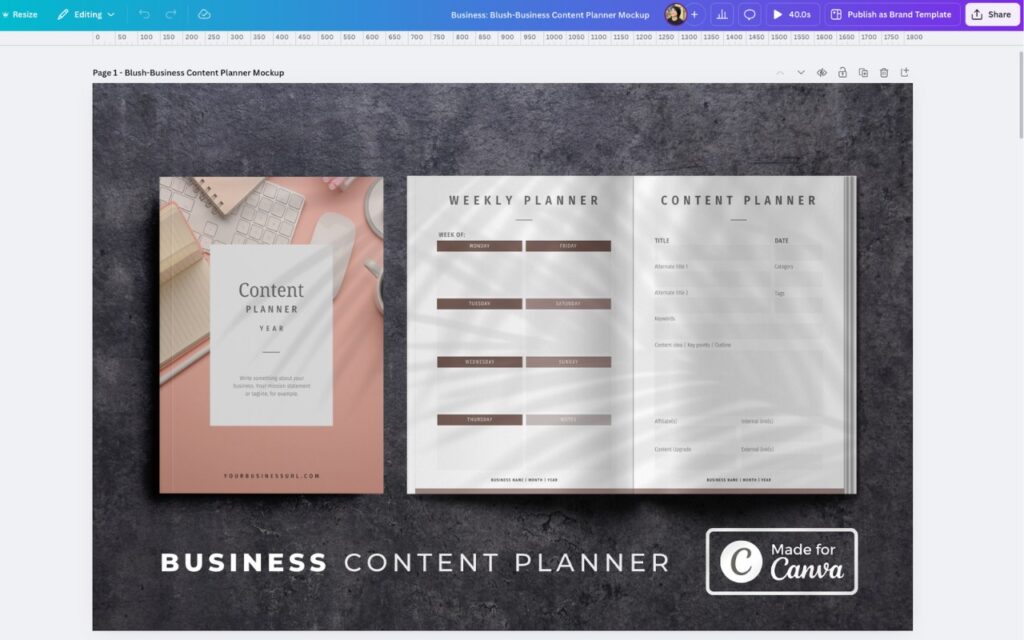
Step 1: Finalize Your Canva Design
Make sure your Canva design is complete. Double-check fonts, colors, images, and layouts to ensure everything is perfect before exporting.
Quick Tip: Always save a copy of the original Canva file in case you need to revert back!

Step 2: Export to PDF
The next thing is to save your Canva design to PDF.
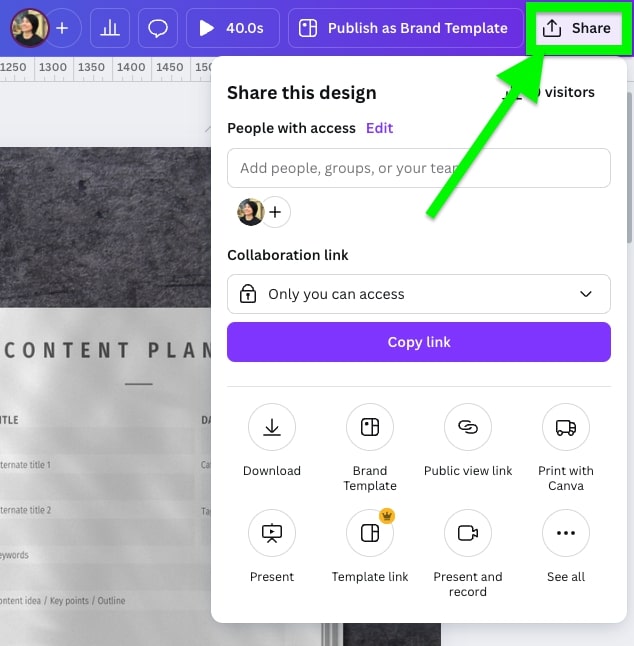
Click Share at the top-right corner of Canva.
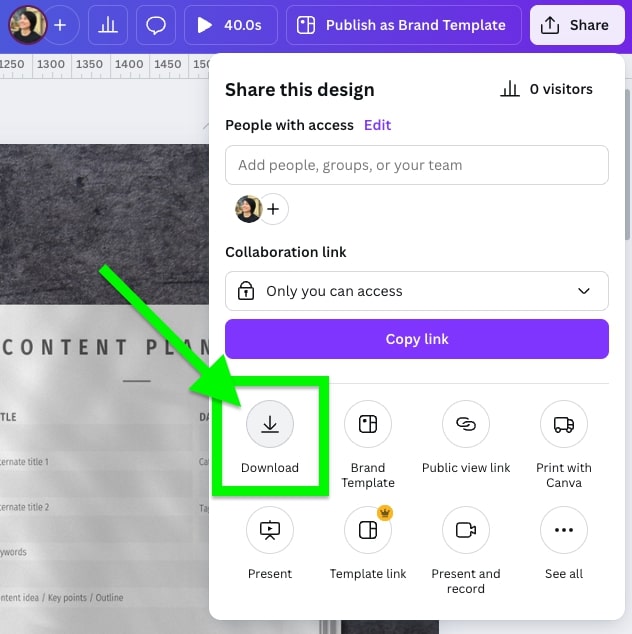
Select Download.
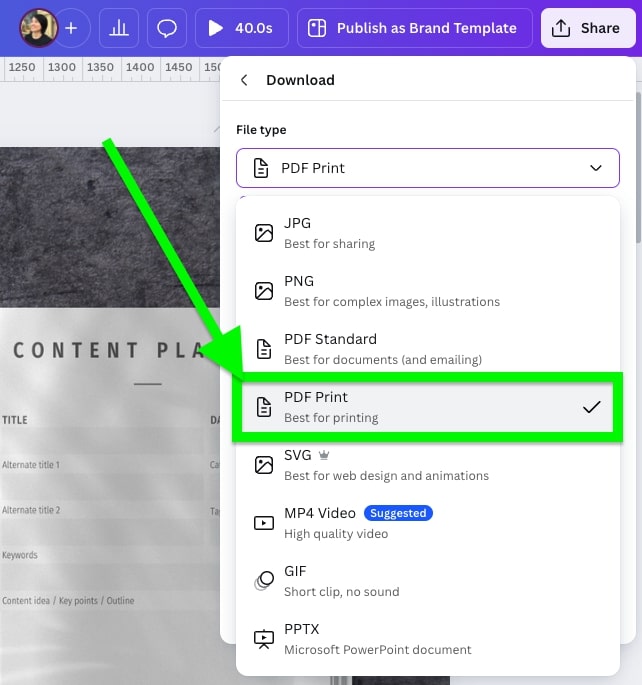
Choose the file type as PDF Print (this ensures the highest quality).
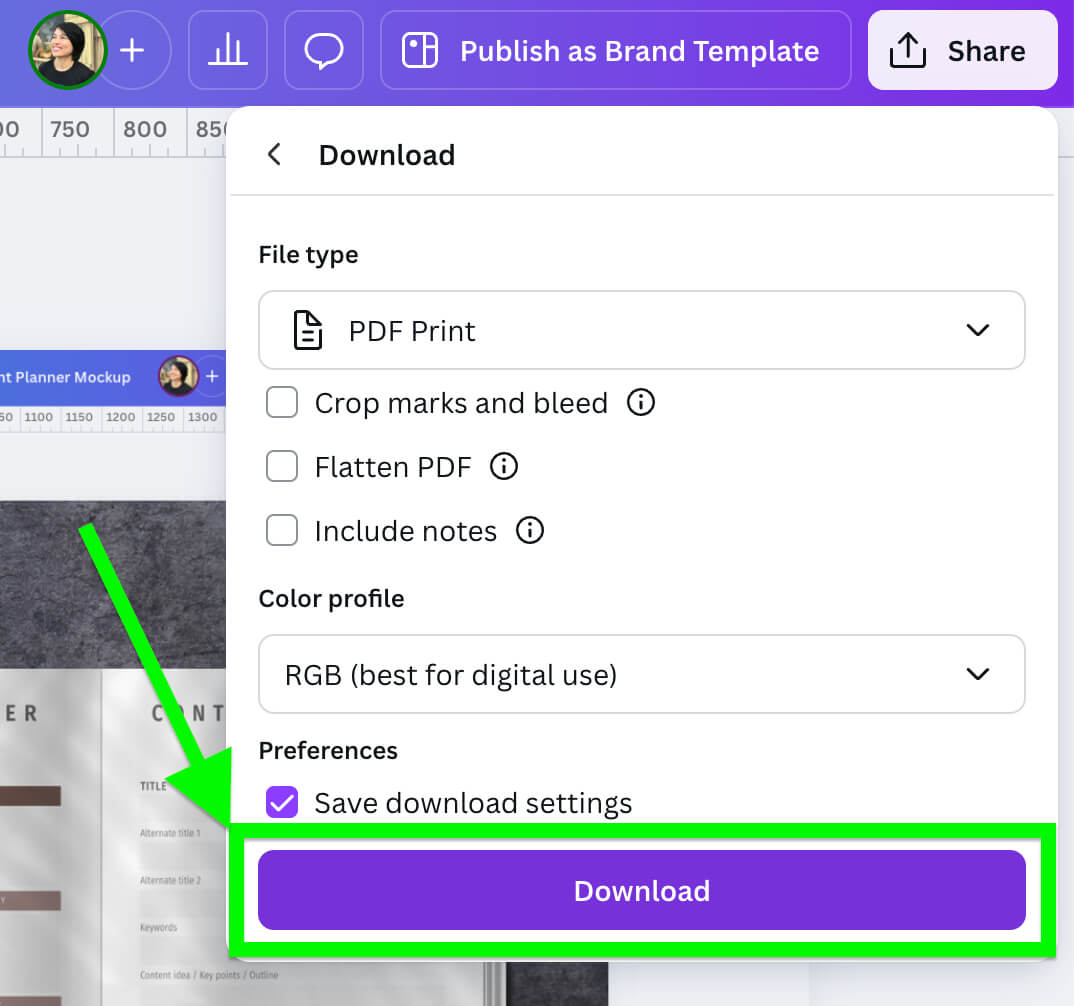
You will see some options, like “Crop marks and bleed” and “Flatten PDF”.
Leave them unchecked.
Click the Download button.
Step 3: Convert PDF to PSD
Since Canva doesn’t directly support exporting to PSD, you’ll use a PDF-to-PSD converter. A recommended converter would be Photopea.
You don’t even have to purchase anything or download any app.
Here’s what you do:
Go to Photopea.com.

Click Open From Computer, and select your downloaded PDF file, or drag your file into the box that says “Drop any files here”.

Wait a few seconds for it to load as larger PDFs with layered visuals might take a bit longer, especially if your file is design-heavy.
If you’re exporting large sized images often to add to your website, make sure your site is hosted on the best hosting to handle heavy designs.
Compressing the files to below 100kb is always better, but I learned that not all can be compressed with the same good quality result.
Once loading is done, your file opens up in Photopea’s interface.
Select “File” in the top left-hand corner and then select “Save as PSD” in the dropdown menu.
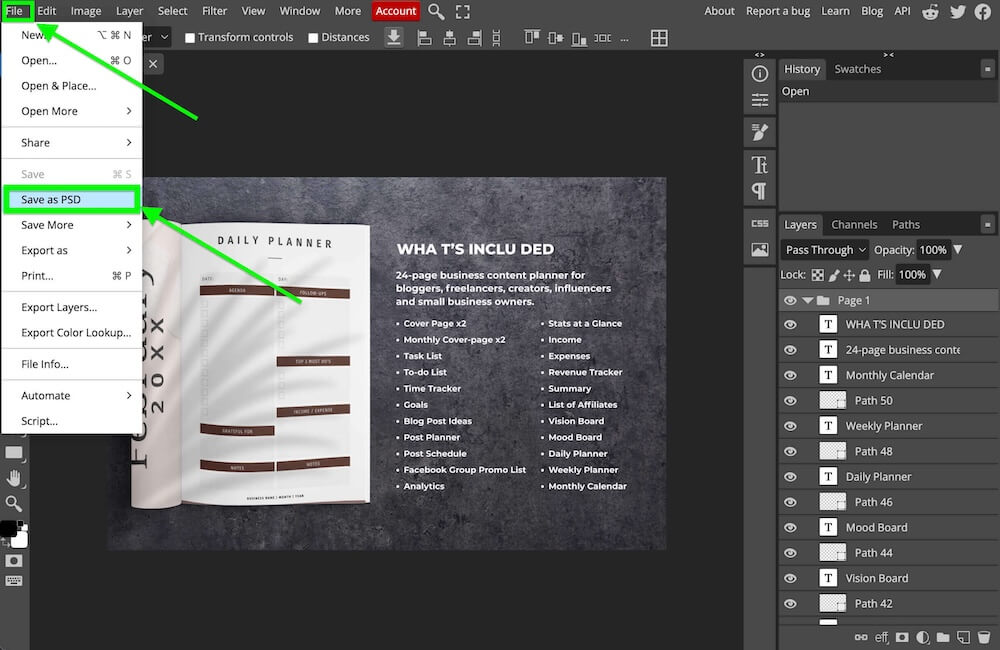
Select a folder to save your PSD file in your computer.
Step 3: Edit Your Converted PSD File
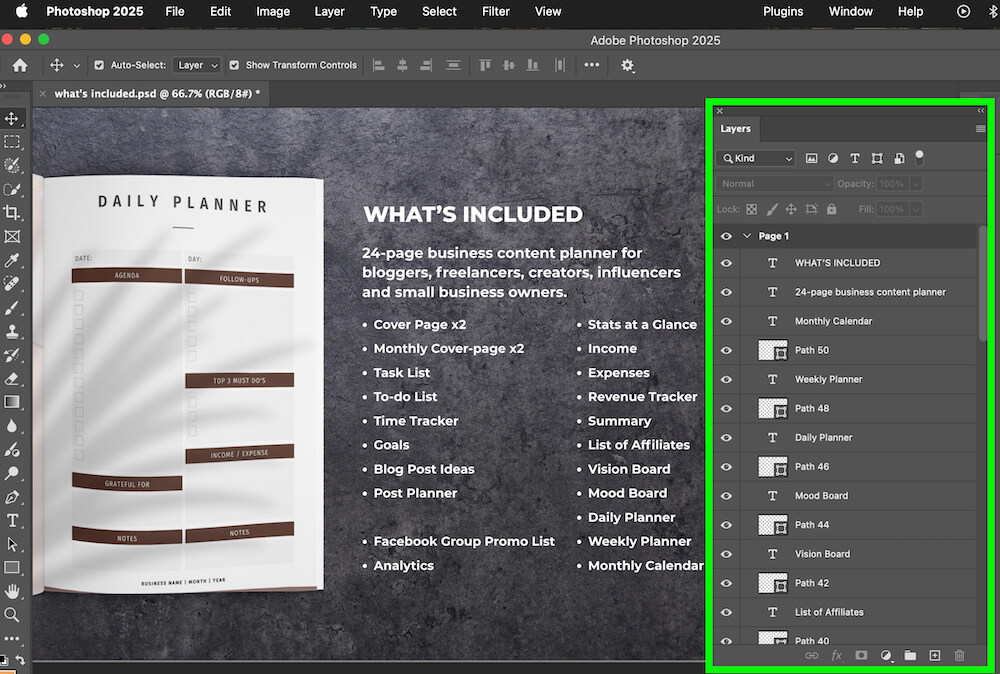
Now, open the downloaded PSD file in Adobe Photoshop. You’ll see your Canva design in separate, editable layers that you can individually make changes and tweaks.
Tips to Get the Best Conversion Results:
- Keep layers in Canva organized clearly to ease editing in Photoshop.
- Avoid complex gradients or raster effects that might not translate perfectly.
- Check and adjust text layers in Photoshop, as fonts might occasionally shift.
This website contains affiliate links. As an Amazon affiliate, I earn from qualifying purchases, our own services and products. This tutorial is an independent guide and is not affiliated with, sponsored, or endorsed by Canva Pty Ltd. All product names, logos, and interface screenshots are used for identification and educational purposes only. Canva is a registered trademark of Canva Pty Ltd. Screenshots are used under fair use for the purpose of commentary and instruction.


